rancor-doc
Table of Contents
System Requirements
The system requirements for Rancor are modest. Most of the testing is done on a 2012 Dell 7010 with an i7-3770 16 GB of memory and a basic Micron 256 GB SSD.
Installation
Download the .zip file of the project or alternatively use a git client (Github Client) to clone the repository. Requires collaborator access to the rancor-release repository
Determine if .NET 4.6.1 framework is installed on your machine.
Rancor is a windows application that uses the .net framework. You can determine which version of the .net framework are installed on windows machine by following these instructions.
In order to run Rancor make sure you have .NET 4.6.1 framework or Visual Studio installed on your machine. You can download the .NET 4.6.1 framework.
Running Rancor
This section of the guide assumes that you have the Rancor microworld downloaded, unzipped, and have found a home for it locally on your machine. Please refer to the Getting Started page for instructions on sourcing and downloading the application. This area will guide you through the folder structure of Rancor and ensure you know where things are as you perform your research.
Sections:
- First Level Directory
- Second Level Directory
- Procedures
- Executables
- Configuration
- Data
- Scenarios
- Screenshots
- Rancor.exe
- Setup.exe ***
First Level Directory
The initial folders you will see when you open the Rancor application are: .vs, Application, and Rancor wiki icons. The only folder that is critical for operation is the Application folder. The others can be ignored.
Second Level Directory - Executables and Procedures
This is the primary delineation between the procedure documentation and the main application files.
Procedures
Navigating to procedures will allow you to find and open pdf files of procedures intended to be used with the scenarios. There are two options between English/Imperial measurements and Si Units (Metric) measurements, depending on your specific needs for the experiment you are running. There is also a folder named Korean. This folder includes procedures that have been translated into the Korean language.
Executables
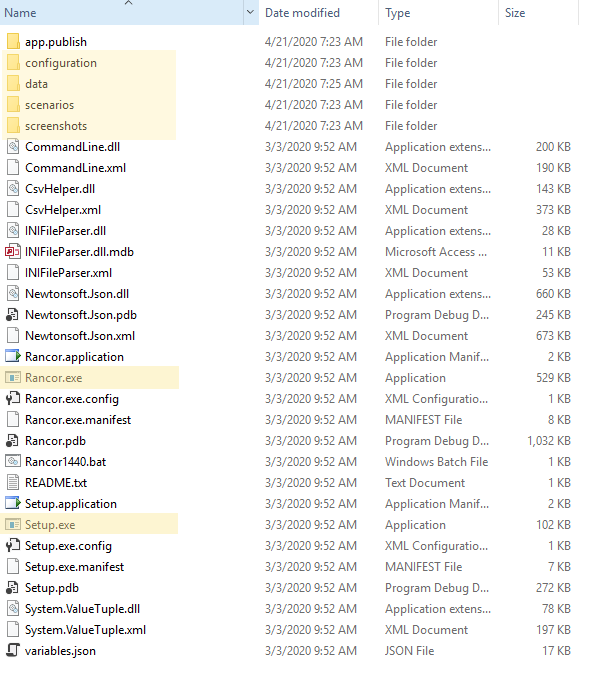
This folder is where you will likely spend the majority of your time while using the Rancor microworld. It includes several folders and a large list of other files which Rancor relies on during the simulation. Refer to the image below, highlighted items are the primary things you will be interacting with and are described below.
Configuration
This folder defined the look and feel of the Rancor simulation environment. There are different settings that can be changed in these files to enable different color schemes and screeen resolutions. Explanations for these is below and a guide on manipulating these will be added in the future.
1080 - configuration for a 1920x1080 screen
1440 - configuration for a 2560x1440 screen
AlarmPanelColor - configuration colors of the alarm panel
IconColor - TBD
Layout1080 - TBD
RadarPlot - configuration for the radar plot parameters
Data
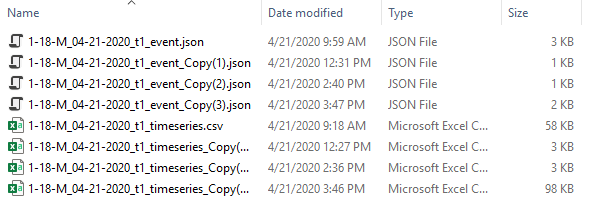
This folder is where your session data will be placed. The images below show a data folder and its contents. Each folder is named by the Trial_Age_Gender_Date paradigm. Further, the actual data sets delivered are an event log in JSON format that lists all control actions or events that occured during the session. The second time series file is a more raw breakdown of the state of every measured parameter at the time scale reported. This is a more granular look at the simulation as a whole but the data may need to be filtered to achieve the desired results.

For more detailed information regarding data analysis and specific methods that have been used with success in the past please refer to the data handling guide.
Scenarios
This folder contains what we refer to as scenarios. They are the collection of plant parameters, faults, measures, and other details about your specific experiment. There are a series of pre-made scenarios that have been used for demonstration or research purposes and these are intended to be used with specific procedures provided in the Rancor installation. Some scenarios simulate steady state, or normal, plant operations while some simulate emergency conditions or sudden failures in plant equipment that require operator action to mitigate and navigate the plant to a safe condition.
It can be beneficial to explore these scenario files in a text editor or other program to begin to understand how parameters are changed in the simulator and how the scenarios can be developed. You can create bespoke scenarios that focus on your specific areas of interest in the setup application as well, which is explained below.
Screenshots
This folder is where screenshots from the simulator are stored. During the simulator there is a button to take a screenshot of the current state of the screens at that precise moment. These can be useful for evaluating specific states prior to a fault or other devations.
Rancor.exe
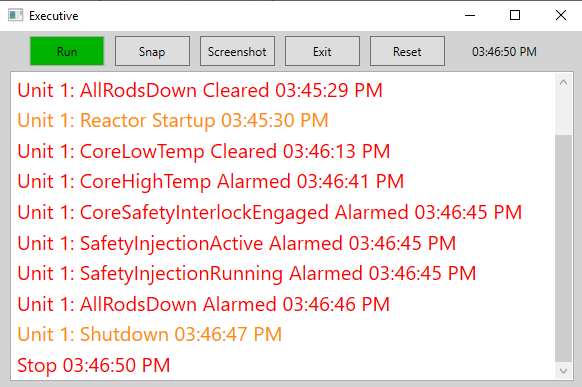
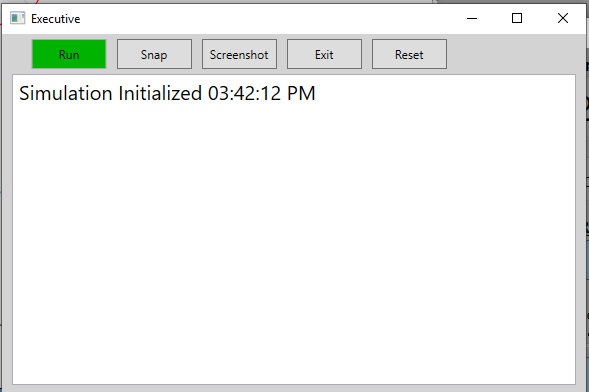
Here is the simulator application. Starting this application will launch into the scenarios folder where you select your specific plant states and parameters and then the Rancor simulator will be built using those states and details. Three screens and the controls panel, which we refer to as the executive, will be available. The screens will be grayed out initially as the simulator is not yet started. The primary controls which you have access to during the simulator session are on the executive and include: starting the simulator, pausing the simulator, taking a screenshot, resetting the simulator to your scenario’s starting point, and snapping.

Of the above functions, most are self-explanatory for the exception of the snap function. This button offers researchers a unique ability to freeze the simulation at a certain point in time and potentially restart from that point. An exmaple application of this could be a research team deciding to adjust their scenario to a specific action of interest that may have become apparent during the experiment but it does not require an entire scenario construction. By snapping you can set a new start point that may be closer to the phenomena you wish to examine and measure.
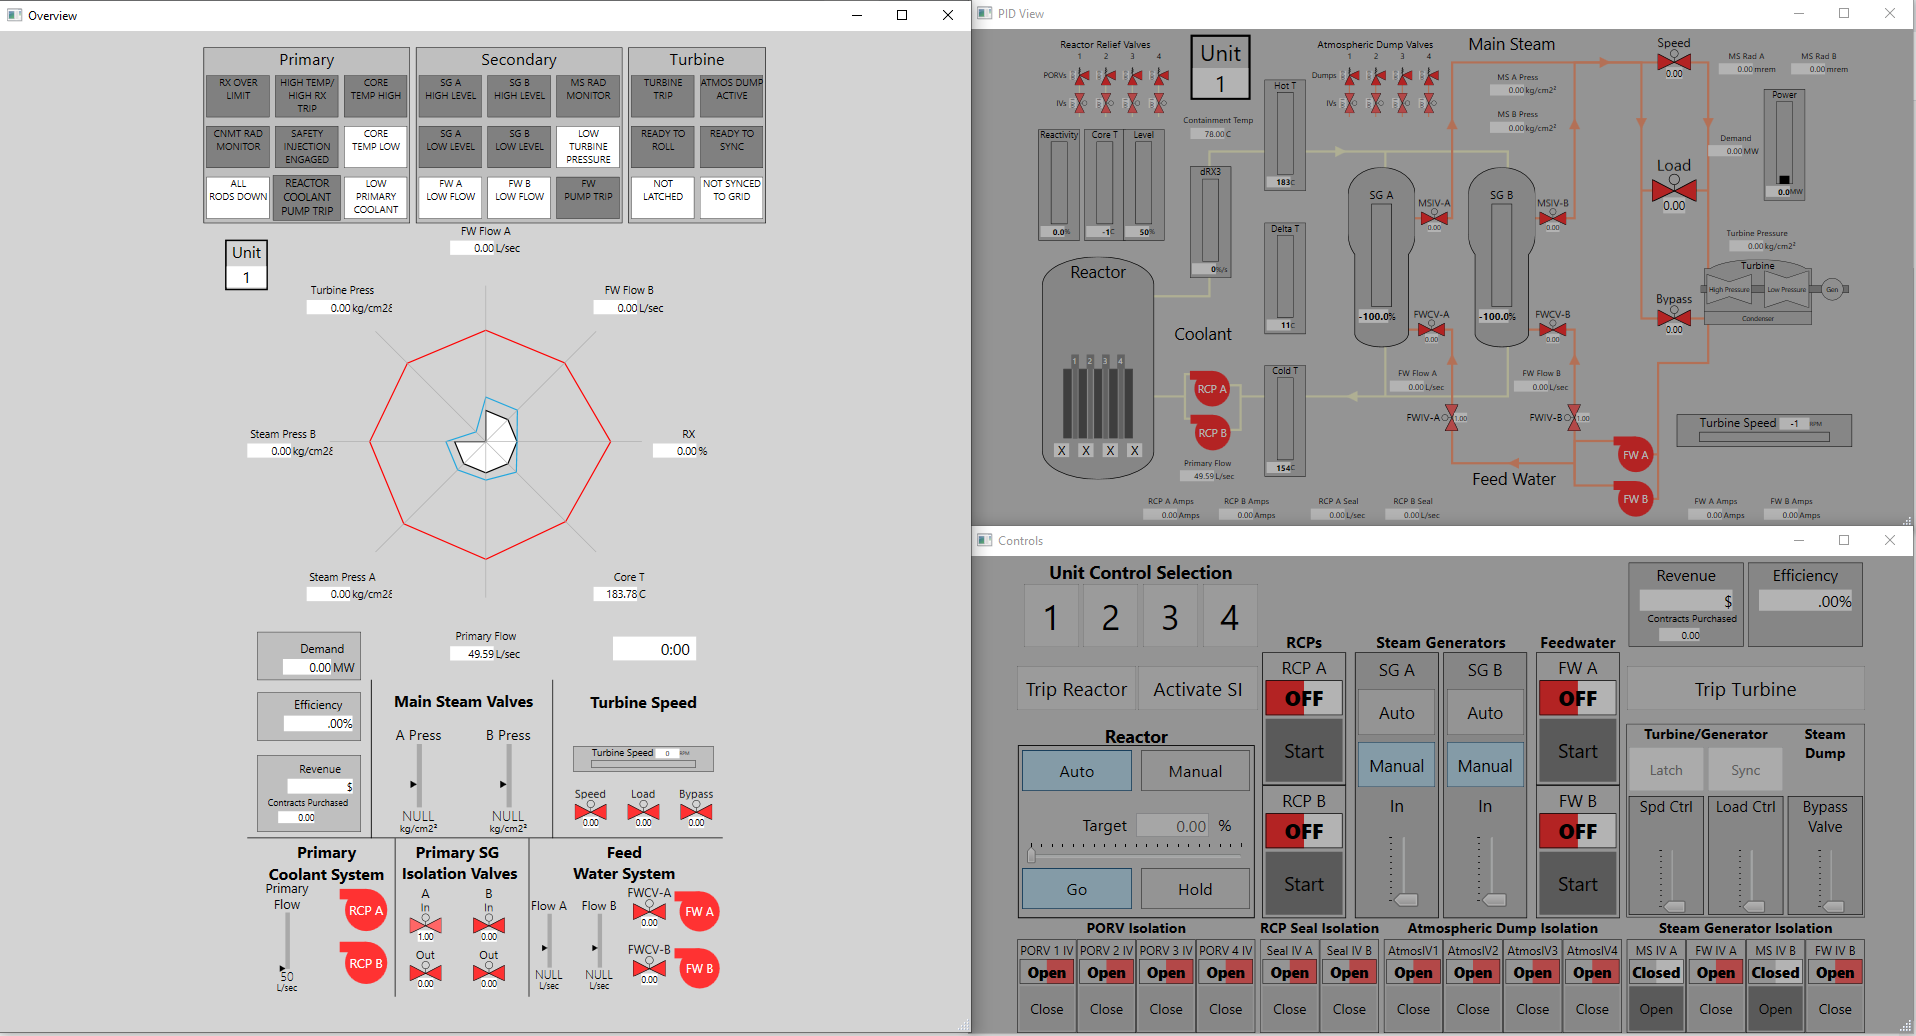
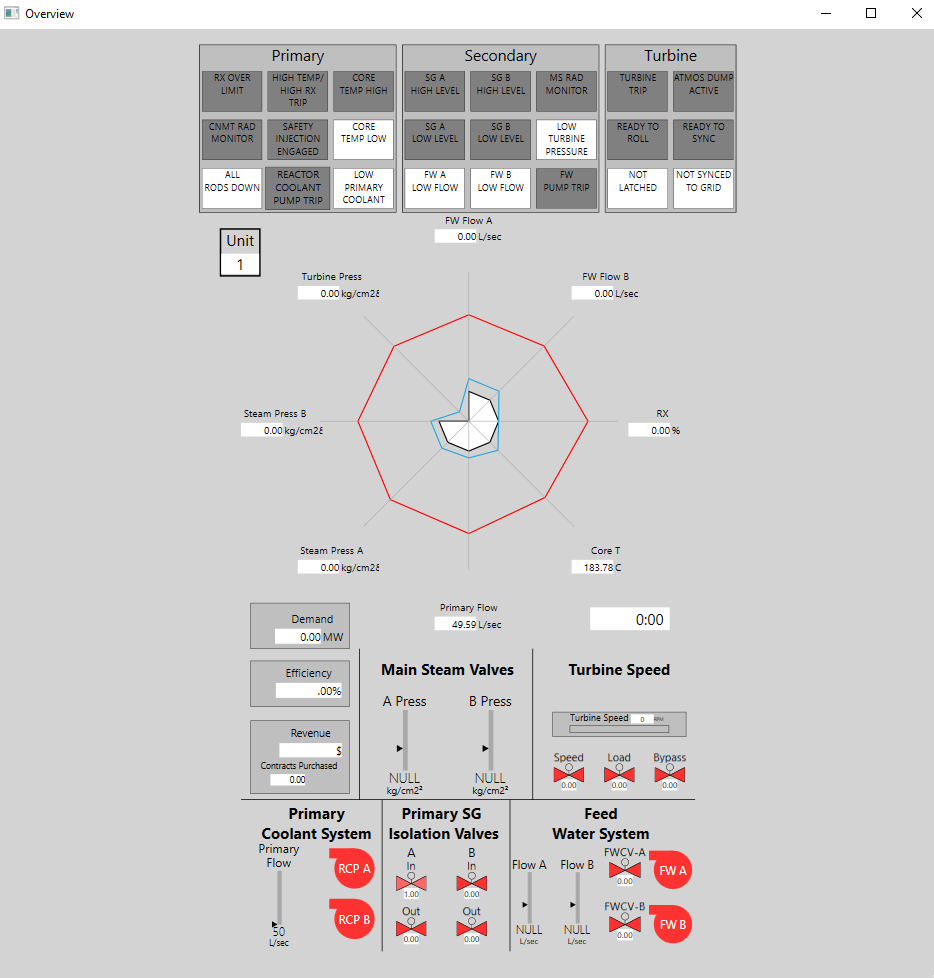
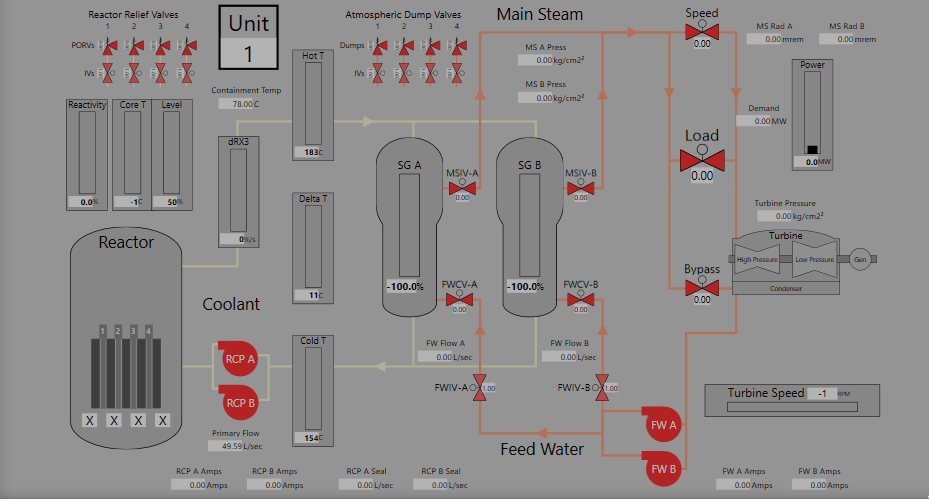
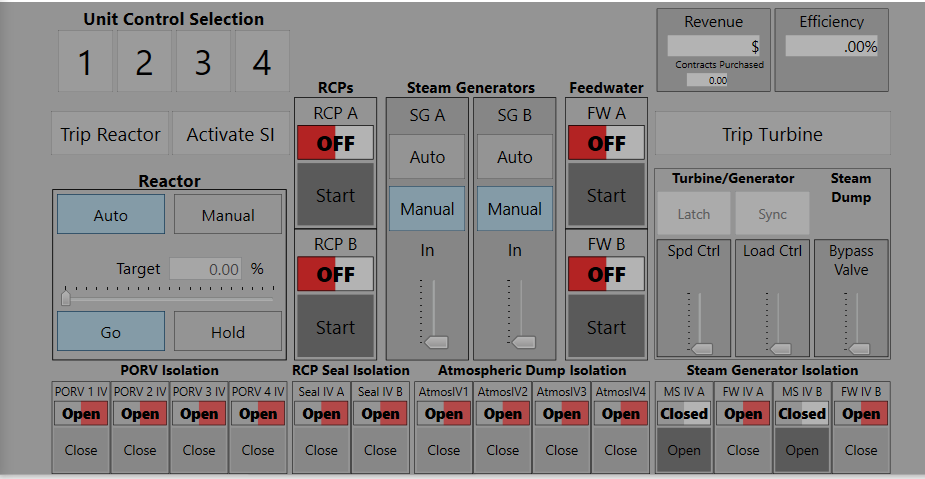
In addition to the executive, the other three screens that will launch are the overview, P&ID, and controls screens as shown below in order. The standard configuration is shown next, with the overview on the left and the other views to the right. This is not a required configuration, and the windows are movable and resizeable to accommodate your specfic needs or research environment. From these screens your participants will interact with the simulator until their complete their goal or fail in some manner which causes a reactor trip and ends the simulation by placing the system into shutdown mode.
Setup.exe
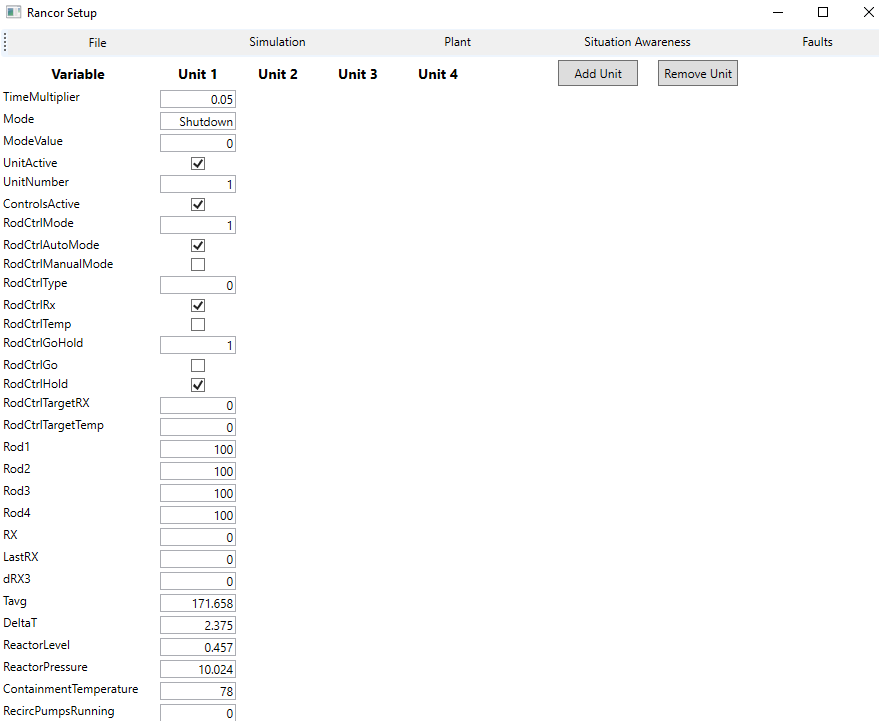
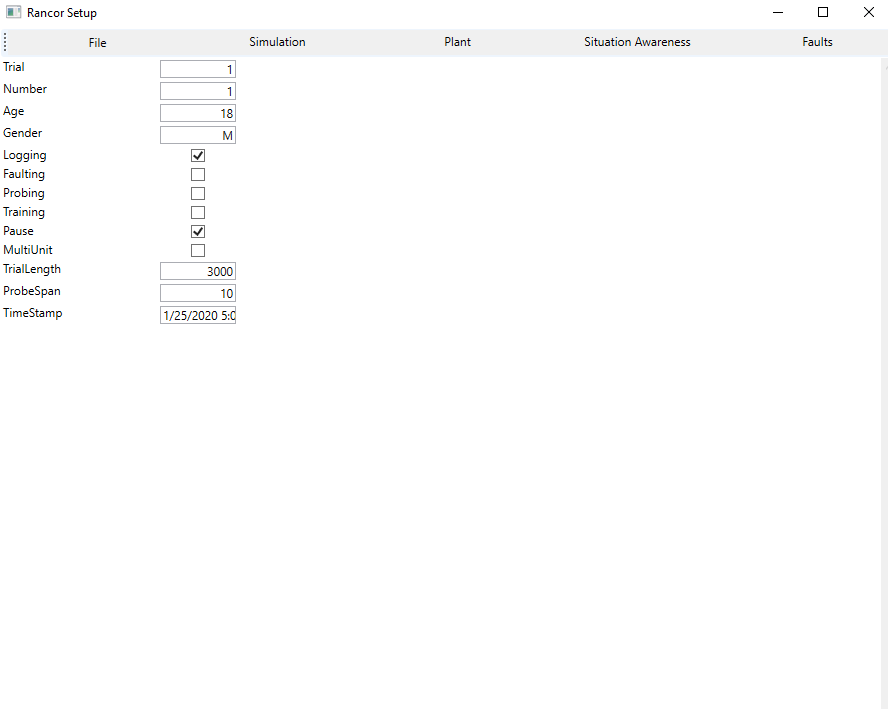
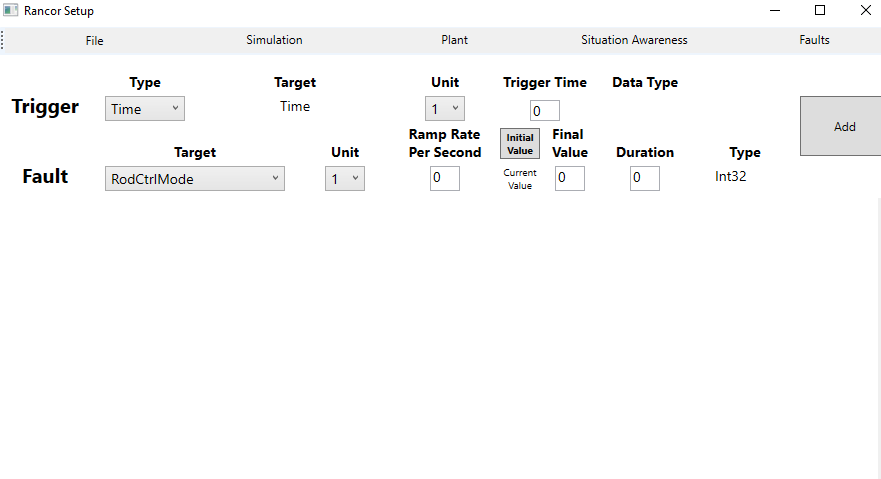
Lastly, the setup application is separate from the main Rancor simulator and is where scenarios are constructed. This is also where additional metadata can be defined, trial length can be set, and faults will be inserted into the simulation. There is a situational awareness section of the setup application that is currently not supported in the mainline Rancor release, but may be added in future instances. If you choose to modify these settings, you can click file at the top left and choose to save the scenario and run the simulation from these parameters. Warning: This will require some additional configurations in the simulator in order to ensure functionality.
Procedure Catalog
Procedures have been developed to startup, shutdown, and handle abnormal events. The current catalog of procedures contains: Viewing procedures requires collaborator access to the rancor-release repository
OP-011 Manual Feedwater Control


